Author: studio_admin

  • 2025 Christmas Card

    2025 Christmas Card

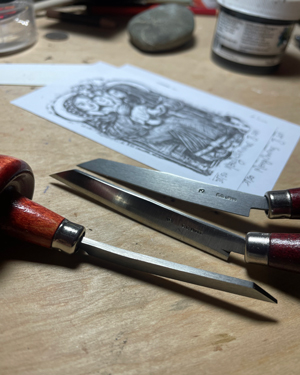
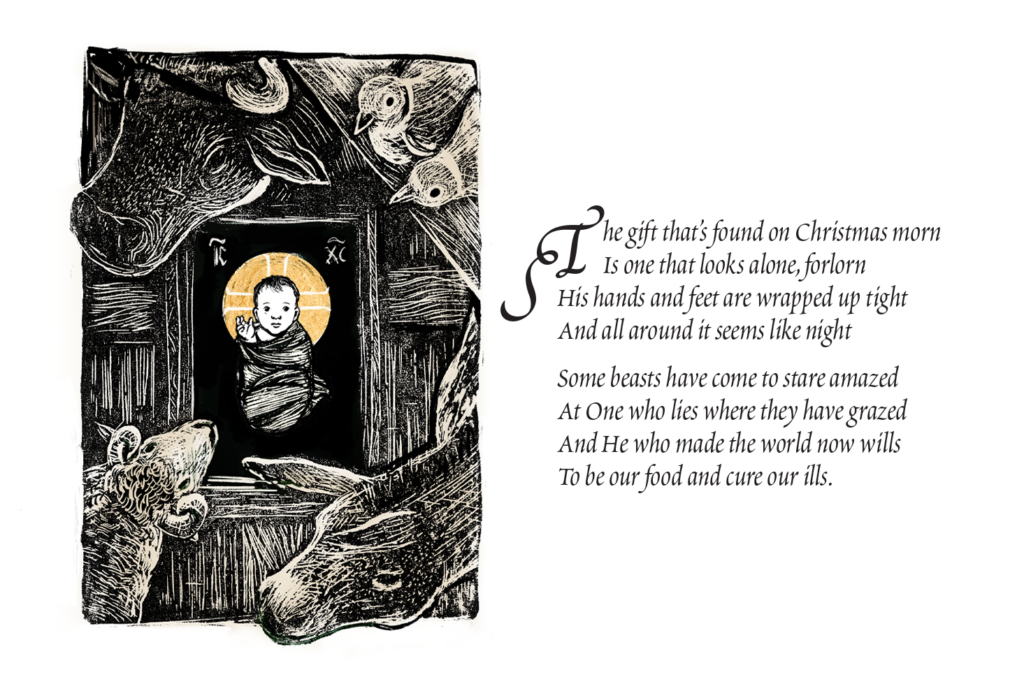
    Once again, I attempted to create an endgrain wood engraving print for our family Christmas card. (See last year’s card here.) This year I used a piece of maple that Timothy had in his stash of wood. The wood came from a church pew he had salvaged so I thought it was very appropriate to use for a Christmas card. I had Timothy cut and glue up the wood to the approximate size of the card. I then had to sand and sand and sand it to create a smooth surface. After my first attempt at using the maple, I realized that I needed to practice a bit more with my engraving tools. (In the end, I restarted this design 4 times!). I also found that I had to sand and sand and sand it even more, because when I created a test proof of the detail I had carved, the irregular surface of the wood created a lot of unwanted texture in the print.

    Early sketch

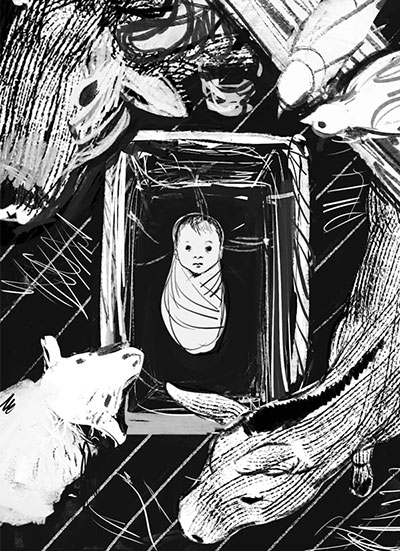
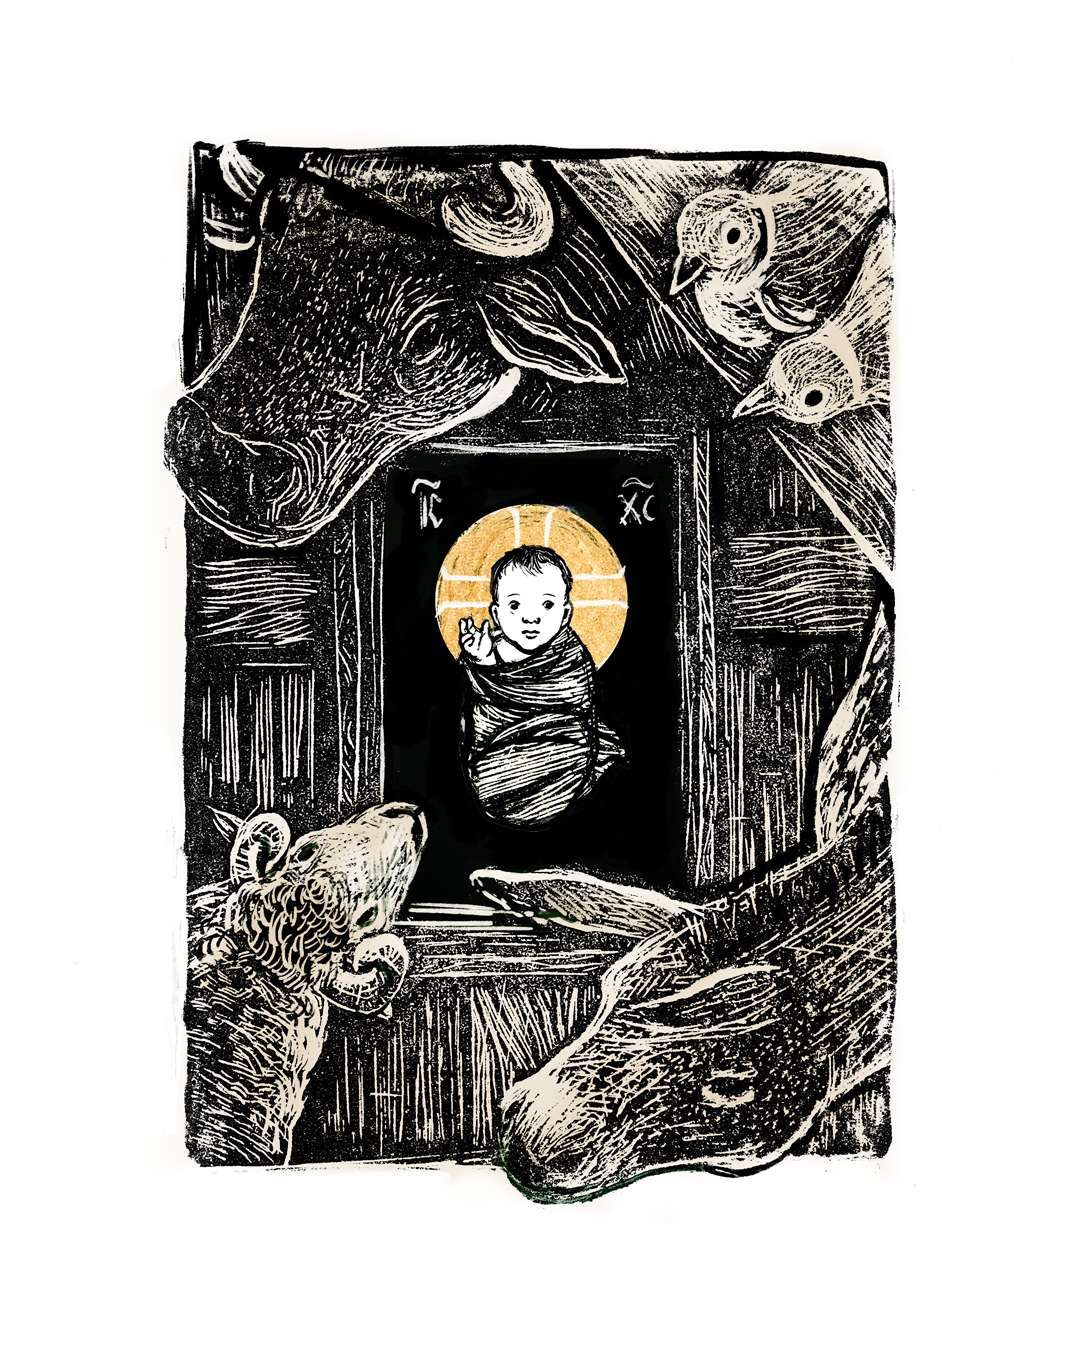
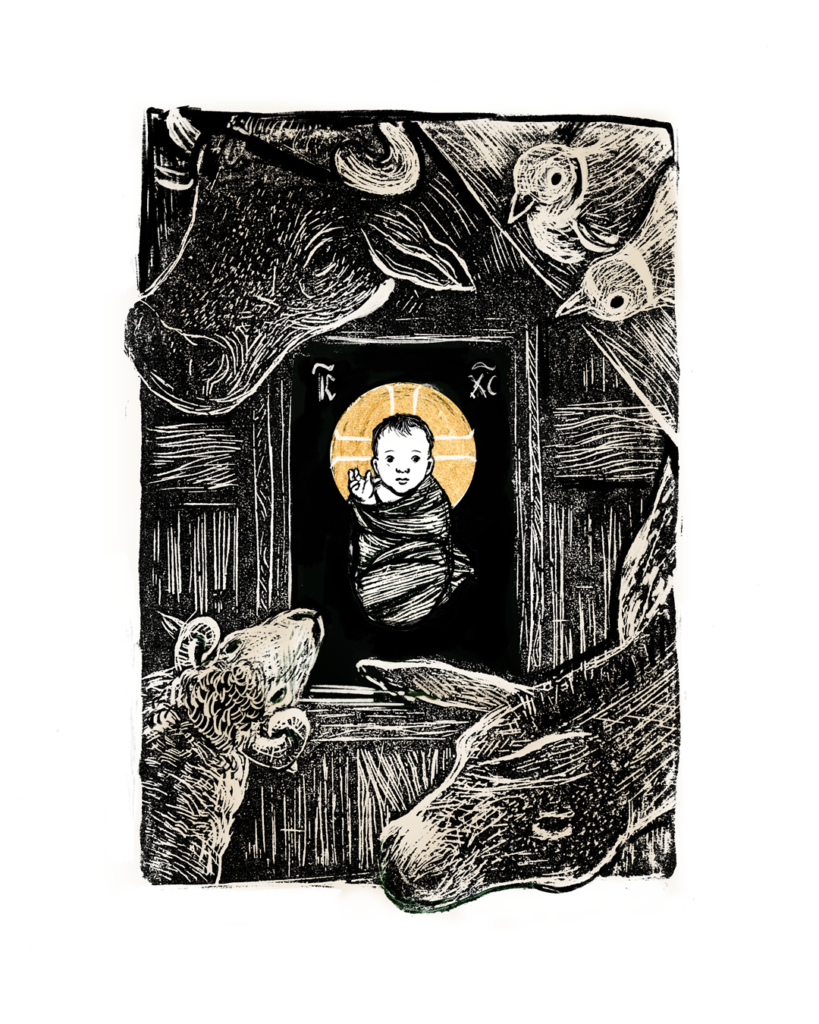
    Here is the sketch on which Rachel’s poem is based, which shows Jesus all bound up in swaddling clothes. Many months went by before I picked the project back up and created the final version, in which I let his hand peek out to bless the world; I had forgotten that this didn’t match Rachel’s description in the poem.

    Nativity (Novgorod late 15c Pavel Korin Museum) cc Jim Forest via Flikr

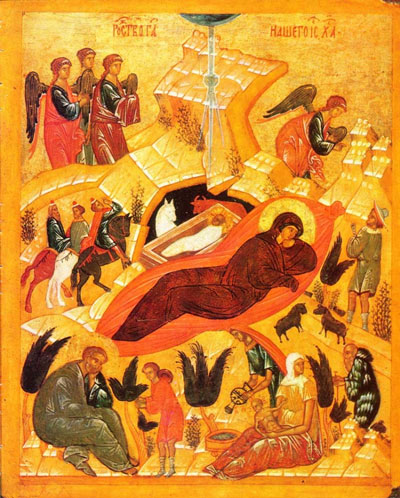
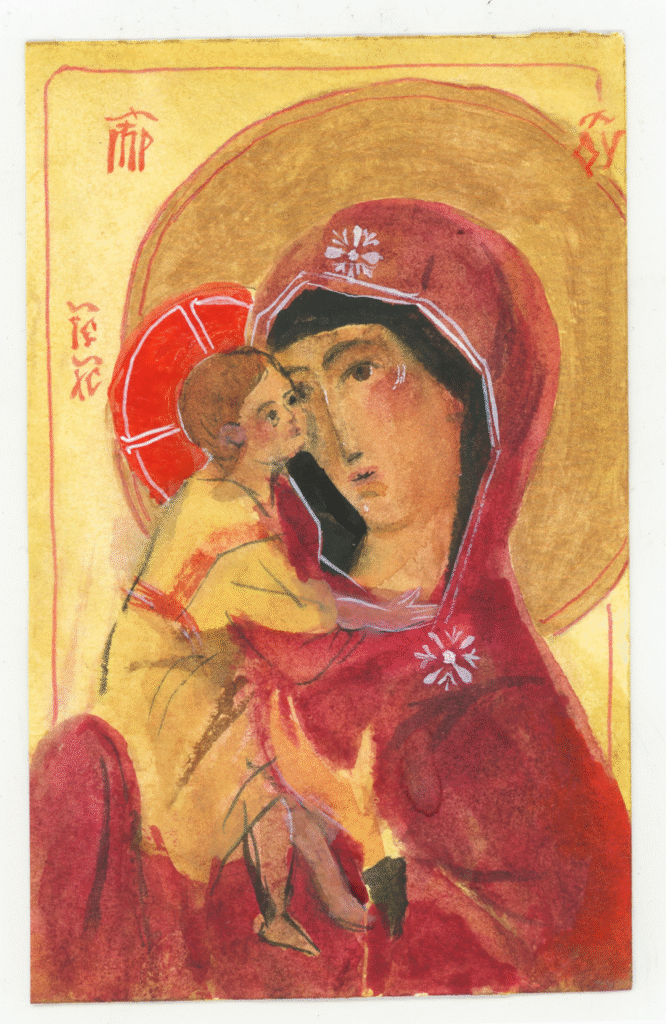
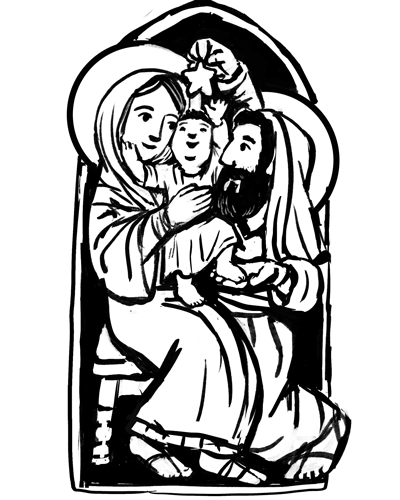
    My design was partly inspired by Emma Fitzgerald’s presentation on iconography at the Simone Weil House’s Agronomic University. During the presentation, Emma displayed this historic icon of the Nativity, and pointed out that the black of the cave represented the grave (as did the swaddling clothes.) In my sketch, I imitated this by drawing the baby Jesus floating in in a black rectangular void rather than drawing the wood of the manger.

    As I mentioned I restarted the carving 4 times. This isn’t as bad as it sounds, (except for all the extra sanding) because I started with Jesus’ face. I figured if I wasn’t happy with how baby Jesus looked I wouldn’t take the trouble to carve the rest of the design. In the end I still wasn’t satisfied with how the baby looked (I really was attached to my final sketch!) Despite my unhappiness with how I captured baby Jesus’ face, I foraged ahead because it was getting late!

    My final sketch (with color) which I transferred to the block. Here is another lesson I learned from this years card: The sketch for the sheep is not very well defined. It would have been better to plan it out better because engraving is not a forgiving art. Once you carve something away you can’t put it back.

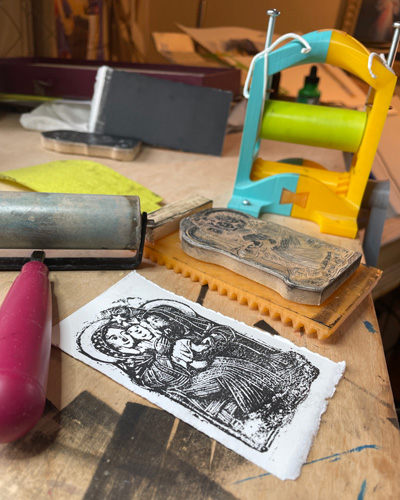
    I printed the first 10 prints and was happy with a few of them (I’m also using new ink this year which behaved differently) but then the thinner lines on the block started filling in. I tried to clean it in a variety of ways but it seemed to get worse and worse.

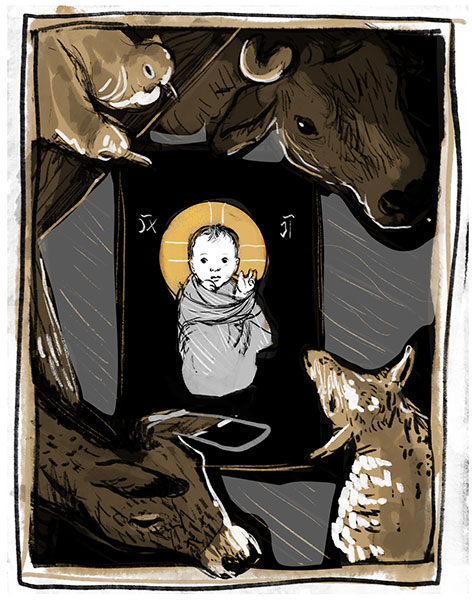
    So, I decided to scan and edit the print and send out the card via email this year. It allowed me to use the parts of the print I loved (the ox) and the parts of the sketch that I liked better than the print (the baby’s hand and face).

    I’m already planning next years card and once again I’m promising myself that I’ll spend some time practicing engraving and printing, and finish the card before advent starts next year. Tune back in December, 2026 to see if I keep my promise. 🙂

    2025 Christmas Card

    Back to 5sparrows.com

  • Living Faith Kids illustration and meditation by Ted and Rachel

    Living Faith Kids illustration and meditation by Ted and Rachel

    As some of you know Ted is the art director for Living Faith Kids a children’s magazine published by Creative Communication for the Family. Rachel also writes devotions for the magazine so we get to collaborate. Here is a page from the Oct/Nov/Dec 2025 issue. That little man sitting in his cave made me laugh as I was drawing him… how many times have I been like him!

  • Mary May 2025!

    Mary May 2025!

    I’m taking part in Amy Rodriguez’s Instagram Mary May Challenge https://www.instagram.com/amyrodriguez.art/

    My plan is to do at least a few of these quick paintings using gouache. Here is May 2’s prompt, Theotokos

  • 2024 Christmas Card

    2024 Christmas Card

    This Christmas, I decided to make my own Christmas card. I love the idea of giving handmade cards to the people on my Christmas list, but I generally end up running out of time. Of course, I could scan an original piece of artwork and then print copies with my ink-jet printer, but that just doesn’t give the feeling of something hand-produced. To get around this problem, I decided to use a mix of new and old technologies to create woodblock prints. That way, I would be able to create duplicate prints that are still hand-made.

    The idea for this method of printing dates back to ancient times when seals were created to stamp official documents. In fact, it is still used to stamp small images on documents. In China, this printing method was used to create the text and artwork for books, while in Europe it was generally used only for the illustrations.

    The first step was to create a sketch of what I wanted the card to look like. Here are my sketches… from very rough to more finished.

    After I had a final sketch I was happy with (though inevitably I never like the final as much as the first sketch… still I hope it has some of the feeling of that idea) I scanned it.

    Then I printed it onto a piece of paper using a laser printer, rather than my usual inkjet printer. Since a laser printer uses heat to apply the ink to the paper, I was able to reverse that process using heat from an iron, transferring the ink image onto my block. I used a wood substitute called Resingrave that is easier for beginners to use and a lot cheaper than the traditional highly polished boxwood blocks.

    The final carved block… the brown color will all be printed black. If I was really skilled at this, I would be able to do multiple blocks and have that orange color be printed in one pass, let dry and then print the black on top of it. Maybe next year!

    Now that I had my image on a block, it was time to dig out my engraving tools. They are like little chisels, and have fun names like Scorpers, Spitstickers and Gravers. The goal is to carve away any areas that will remain white in the final print; because they are lower, they won’t pick up any ink, while areas that are left high will transfer ink to the paper.

    Controlling the tools takes a little practice. I tried three times before I had a carving that I was satisfied with. Once the carving was finished, I used a roller to apply ink. The roller helps to apply the ink in a smooth even layer. With the block inked up, I was then able to start making prints. The basics of printmaking are pretty simple; paper is pressed against the block to create the image. I did this in two different ways; with a small etching press, and with a kitchen spoon.

    I didn’t have an etching press, and they are expensive to buy. But I found an online pattern (https://openpressproject.com) for creating an etching press using a 3D printer. A 3D printer uses a moving nozzle to lay down layers of plastic, slowly building up a given shape. I don’t have a 3D printer either . . . but my library has one that can be used for free. They allow patrons to print out one part every two weeks, so over the course of a few months I printed out all the parts for my etching press.

    In the end, however, I did most of my block prints by just using a spoon to rub the back of the paper while it was pressed against the carved block. Because the back of my block was a little uneven (I had to saw off 1/2 the height of the block to fit it in the press) this method yielded better results.

    Here is my final print… I would have liked to try again but I didn’t have another block handy and this was taking way more time than I had bargained for… though not as much time as creating a custom card for each person on my Christmas card list! I really enjoyed the process of carving and printing my own card. I learned a lot this year and I already have ideas for next year’s card.

    May you all have a very blessed Christmas! If you would like to be on next years Christmas card list, it’s easy, just send me a Christmas card and I’ll be sure to add you to our list. God bless you!